When I explored this new feature of SharePoint in Online (this feature is available in SharePoint 2013 also), I found it interesting because it solved one of the common problems people faced in SharePoint. I will first explain about this feature and I'll cover the problem and the solution in another post.
This feature allows Site Collection Admin assign a unique ID to every document in the site collection out of the box. If you recall, there was no out of the box way to assign a unique number to the documents across libraries in a site collection. Yes ID column is unique but only within a library. Document ID column contains a number which is unique across libraries.
To start with, let's have a look at a typical document library. This is a familiar view for SP guys. By default, you don't get Document ID column in a library.
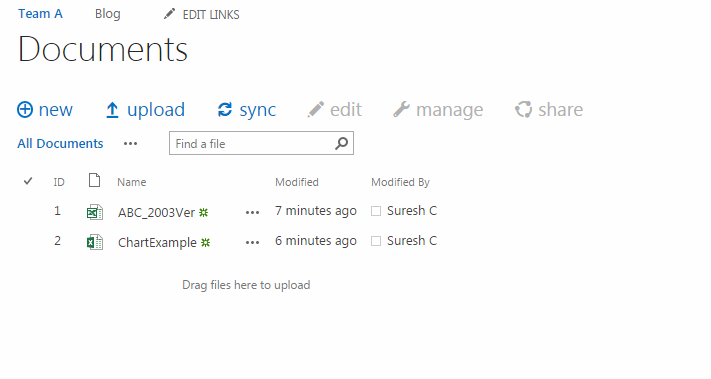 |
| All Items View |
To get Document ID column, you need to activate a site collection feature "Document ID Service" as shown below.
 |
| Site Collection Feature |
Once this feature is activated, you can notice a link under Site Collection Administration called "Document ID Settings".
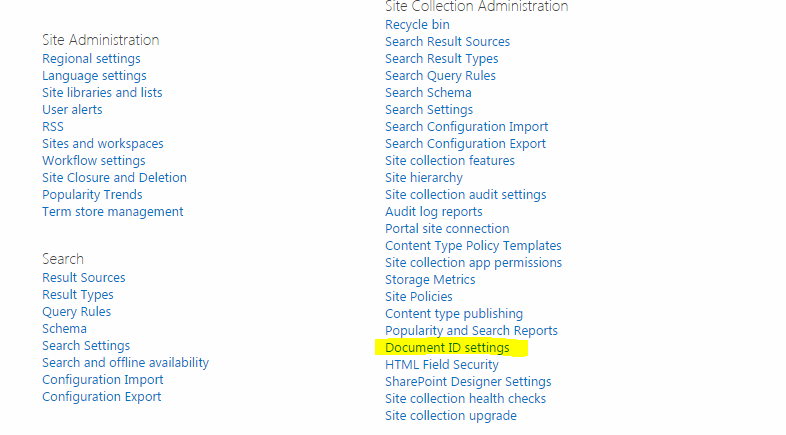 |
| Settings |
When you click on this link, you are shown with some options. Here I am prefixing document id with "DOCID". Also you need to check "Reset all Document IDs in this site collection..." check box.
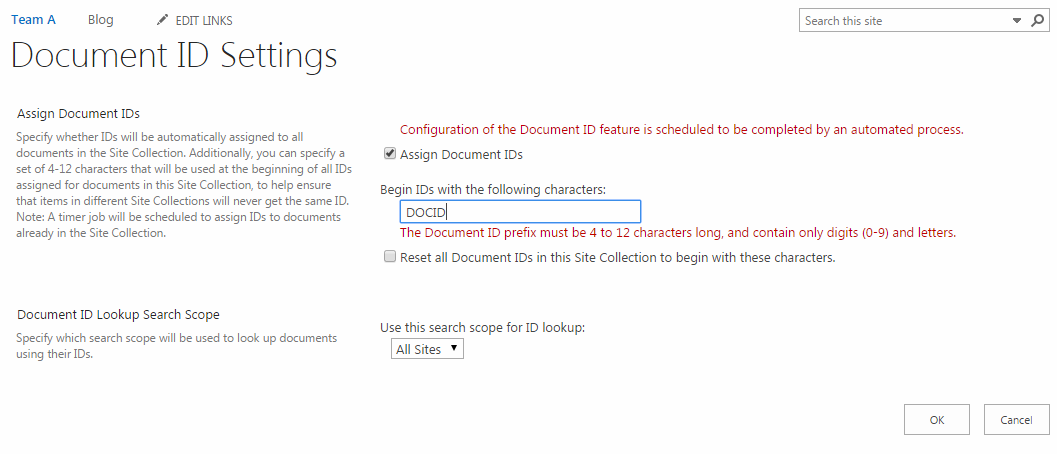 |
| Apply Settings |
By this time, Document ID column is available in all the libraries. You need to go to Modify View page to add this column.
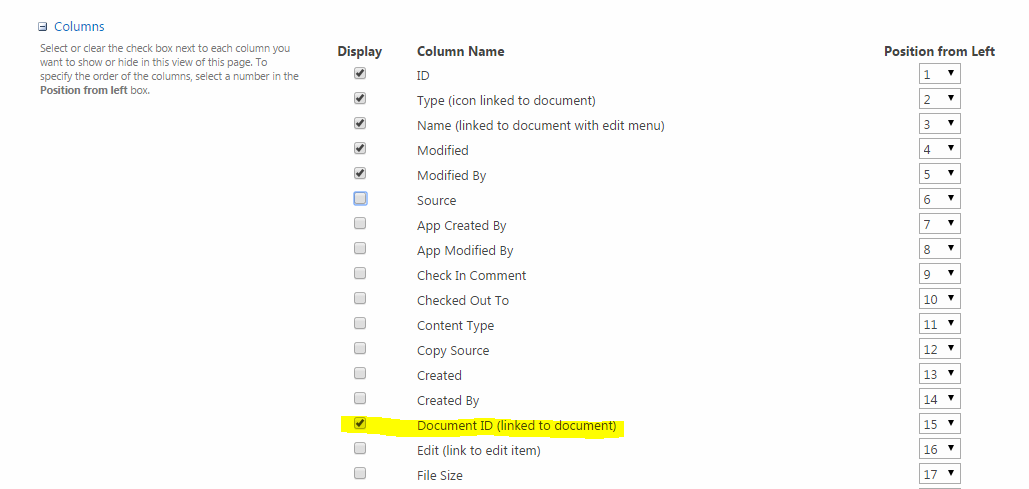 |
| Add to View |
Once you add it to view, this is how the value looks like for Document ID.
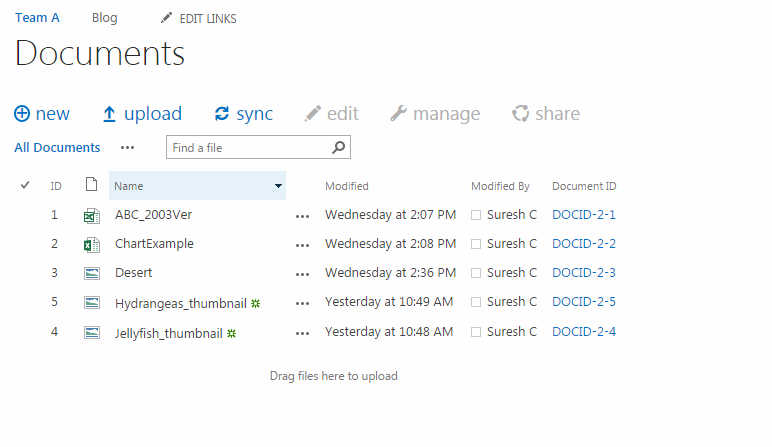 |
| Document Library View |
This value has three parts: [Prefix Text]-[Library Number]-[Item ID]
This Library Number is my guess as I observed in some cases. How this number is allocated is not yet clear.
I copied an item from one library to another and the copied item got a new number to it.
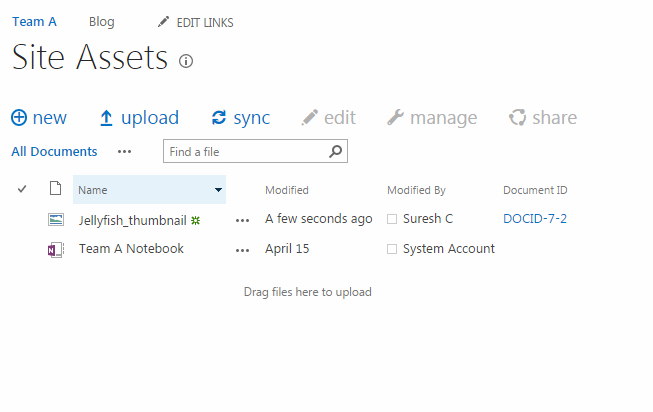 |
| Copied item with new Document ID |
Another interesting observation is, when I navigate to Record Center, it had a search option to search based on Document ID.
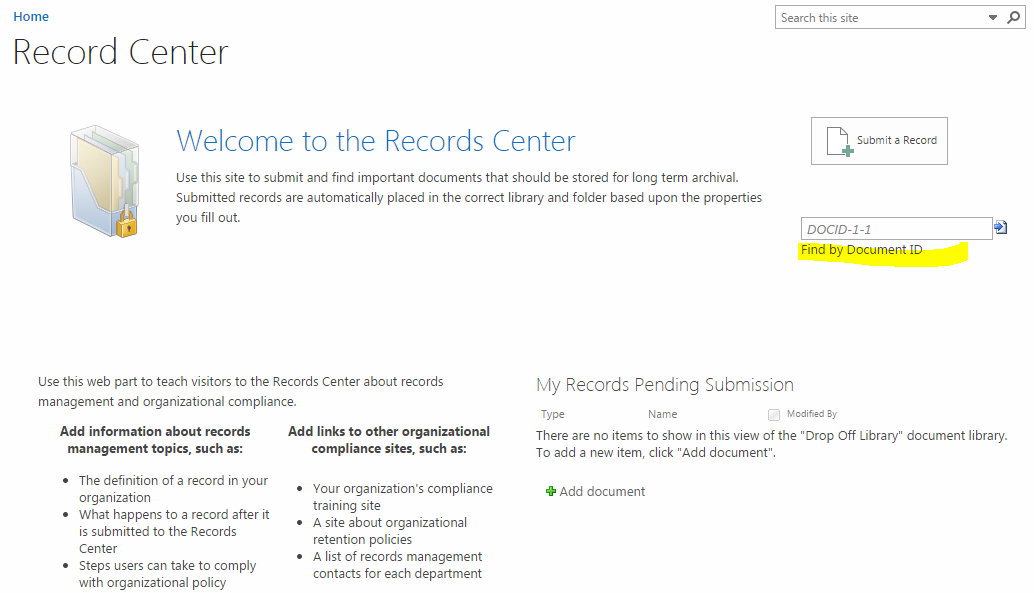 |
| Search based on Document ID in Record Center |
It will take you to Display Form of that specific document.
This feature can be used to solve many business problems especially in the case of compliance requirements. Of course, how best we can use this feature is up to the solution providers to decide.
In my next post, I'll discuss about a simple solution to a simple problem which we faced in previous versions of SharePoint.
Update [6-May-2015]:
How to get Item ID in a calculated column using Document ID.
Comments
Post a Comment