At last I got time to play with Display Template. Though this is a simple implementation, this work provided better understanding of customizing the Display template for SharePoint Search results.
The requirement is simple. By default, when you do search, it displays Results Count at the bottom of the page as shown below.
 |
| Results Count in OOB Search Page |
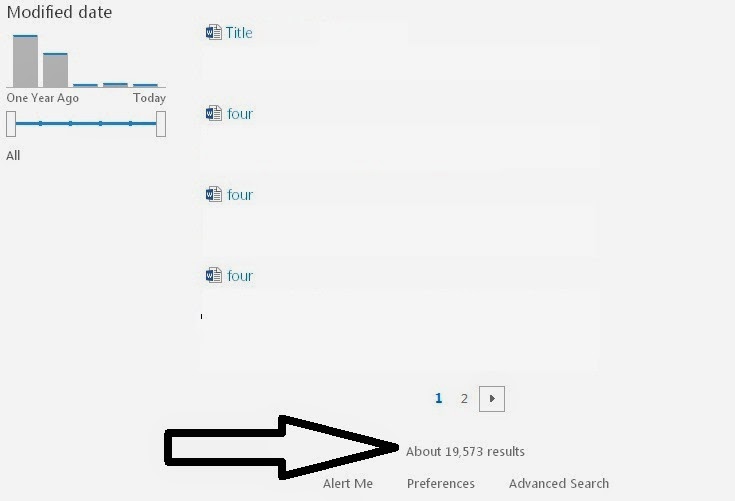
The requirement is to shown the Results Count at the top just above search results as shown below:
 |
| Results Count at top |
Let us see how do we achieve this.
Let us first understand how default display template is related. Navigate to Results.aspx, edit page, and edit Search Results web part. You will see something like below.
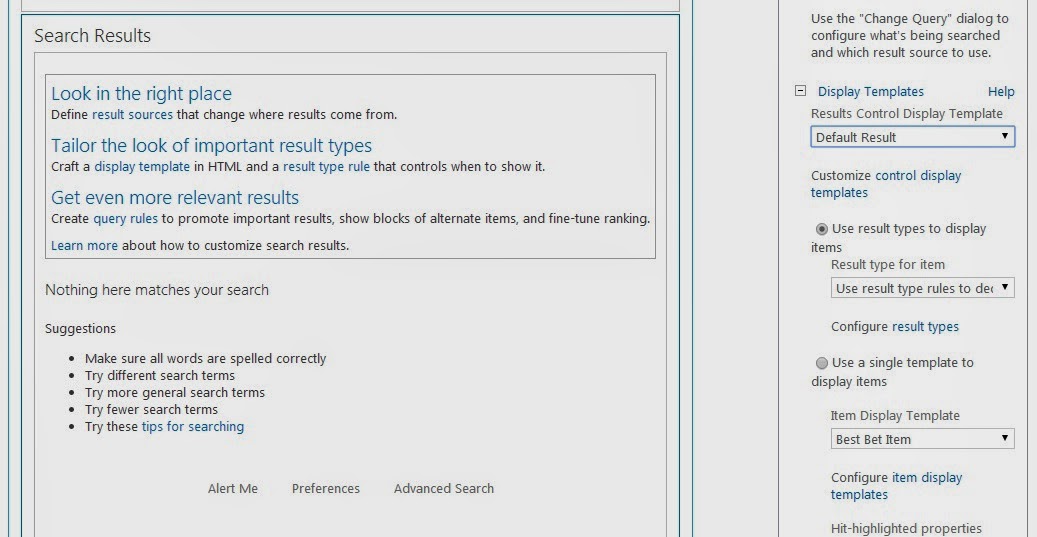 |
| Search Results Web Part Properties |
If you closely look at the "Display Templates" section, there is something called "Results Control Display Template" and it is by default set to "Default Result".
Now, we need to locate the file and modify it to our needs. For this, navigate to Master Page Gallery -> Display Templates folder -> Search folder and here look for Control_SearchResults.html file. Also observe that there is javascript file with the same name. We need to only worry about HTML file and SharePoint will create JS file automatically. Let us not touch OOB file, hence download this file and rename it as "Custom_Control_SearchResults.html".
Open Custom_Control_SearchResults.html in any editor. We need to look at two things here. First, under HTML Title tag, you can see the text "Default Result". This is the text which is shown in web part properties drop down (refer previous diagram). So, change this title to "Customized Default Result".
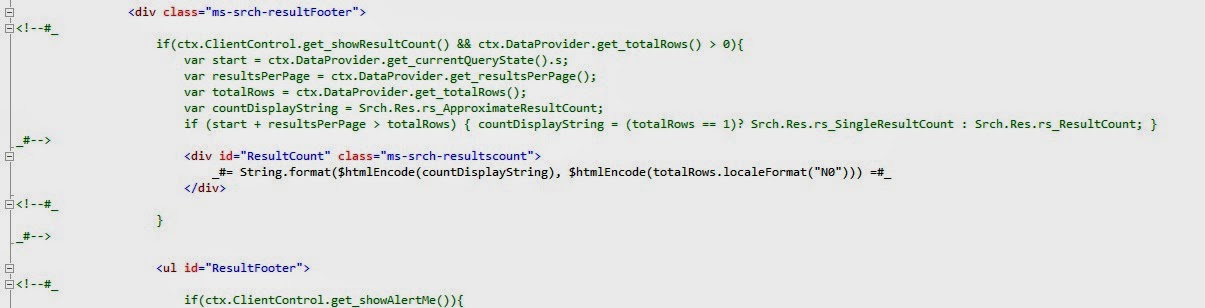
Next step is to identify the section of the code which is displaying Results count in the page. I just searched for ResultCount and I got the section as shown below. Here, our code of interest is between "ms-srch-resultFooter DIV tag and UL tag.
 |
| ResultsCount in Footer |
As it is clearly seen, resultscount is within Footer section of the template and hence this is displayed at the bottom. Now, I'll cut these lines and paste them just above "ms-srch-result-groups" DIV tag as shown below:
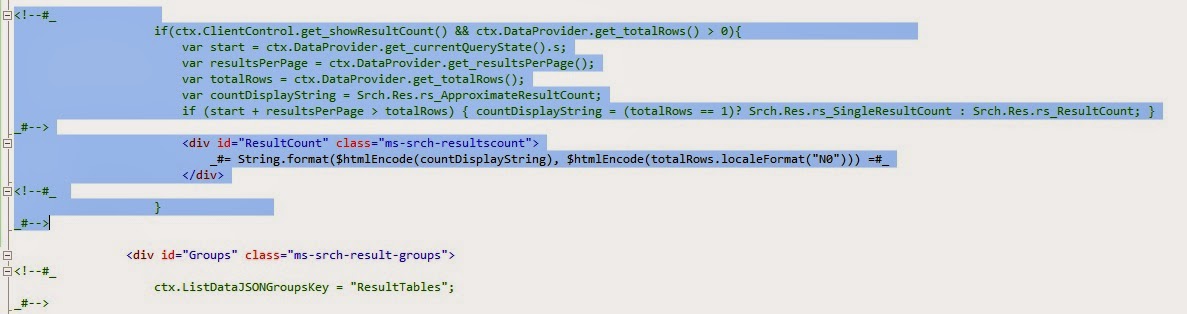 |
| ResultsCount re-positioned |
Save the file and upload it to the same folder in Master Page Gallery from where you downloaded Control_SearchResults.html. In the file properties window, ensure that Content Type is Control Display Template (Actually, since we have taken copy of out of the box display template, most of the properties remains correct) as shown below.
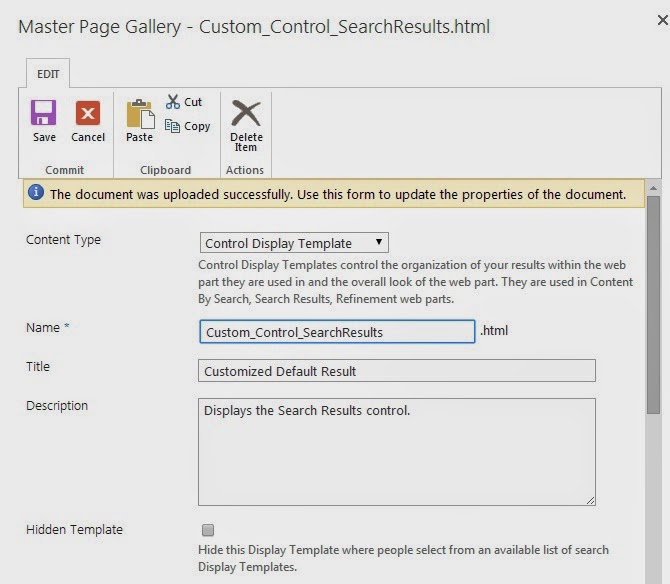 |
| Property |
Save this file. Observe that SharePoint has created javascript file with the same name. Don't forget to publish these files.
Now, go back to Results.aspx, edit Search Result web part, under Results Control Display Template you can see the customized display template is shown. Select that, save the page.
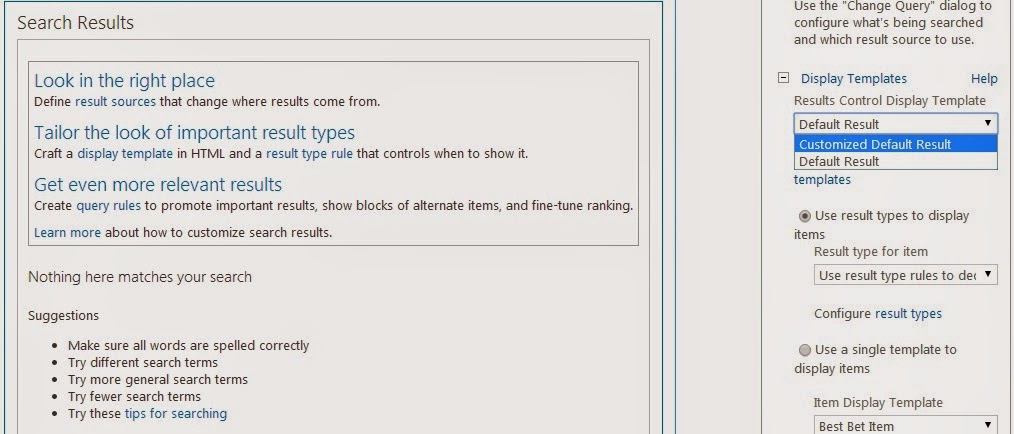 |
| Customized Display Template selection |
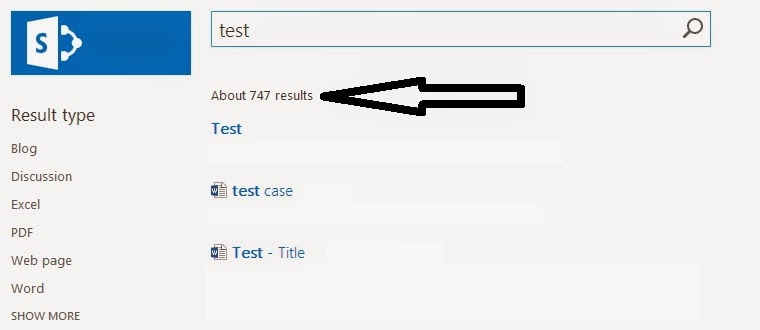
Now do search and you can see the results count just above the results.
Did all the above. Search portal for admin showed op with search result on top of page.
ReplyDeleteJust as expected. Loging in as user (visitor), all the search results were gone.
Fixed this by checking out the file on the masterpage and checking in (version 1.0 publish).
Now working great. Thank you
Ps, sharepoint 2019
Thanks, this works perfectly. Is there a way to similarly move the "page numbers" to the top of the page?
ReplyDelete